Kombucha
Kombucha has gained popularity in recent years, and there are many
flavours and brands to try. A bottle of kombucha sells for around $4,
but if you like your daily fix you just need to find a scoby to adopt,
and you can make your own and save!
Ingredients
-
2L
boiling water
-
1/2 cup
raw caster sugar
- 4 teabags
- scoby
-
1/4 cup
leftover kombucha
Tools
-
2L
sterilized jar
- muslin / netting to cover the jar
-
2 x
1L
jars
Steps
-
Dissolve sugar in the boiling water, then add the teabags and
allow to cool
-
Once cool, add the scoby and the kombucha into the jar, and
cover with the muslin / netting
- Leave the jar in the hot water cupboard for 10 - 15 days
-
Decant liquid into 2 bottles, putting aside 1/4 cup of liquid
and the scoby to use for your next kombucha
Tips ✨
See below for instructions on how to
sterilize jars.
Cold brew
Cold brew is so expensive, and I don't know why - it's so, so easy to
make!
Ingredients
-
very coarse ground coffee (the same consistency as breadcrumbs)
- water
Tools
- a large, sterilized jar
- muslin
- sieve
Steps
-
Working to roughly a 1:8 coffee-to-water ratio, place your
grounds in the bottom of the jar, and cover with cold water
-
Stir gently until well combined, then cover and leave to steep
for 18-24 hours, either in or out of the fridge
-
When the time is up, strain into a large bowl through a sieve to
remove the larger grounds. Discard these, then tuck the muslin
into the sieve and strain into your jar
-
If there's reside at the bottom, just repeat a couple more
times. If you can't get it out, it may be that your grind was
too fine, so just change for next time 😊
Tips ✨
Ensure your coffee is coarsely ground - finely ground coffee will
produce cloudy, gritty coffee.
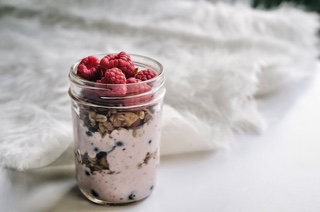
Yoghurt
Making your own yoghurt is simple. You can add stewed fruit, honey or
nuts, or have it plain with muesli. It's important to sterilize the
jars you'll use so there are no bugs present to spoil the yoghurt.
Ingredients
Tools
-
1L
jar
- food thermometer
- sieve (optional)
- muslin (optional)
Steps
-
Sterilize the milk by heating milk in the microwave on the
lowest setting until it reaches at least 85°C (around 50 mins).
Use the thermometer to check occasionally
- Let it cool to 42°C and then add 4 tablespoons of yoghurt
-
Put it in a sterilized jar then pack it in a box with some
padding around it (old towels or tea-towels are great) and leave
it in the hot water cupboard for 6-7 hours
-
(Optional) To make thick Greek style yoghurt tip the newly made
yoghurt into a sieve with some muslin in it, over a bowl and
leave one hour. Clear liquid will drain out leaving the yoghurt
thicker
Tips ✨
-
Use a yoghurt you like as the starter, or try different yoghurts
to start off your batch. The different bacteria in different
yoghurts will result in slightly different tasting yoghurt.
-
See below for instructions on how to
sterilize jars.
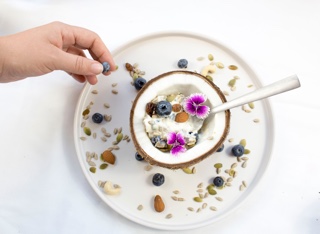
Coconut yoghurt
If the whole milk yoghurt is a little intimidating, try this coconut
yoghurt recipe. It couldn't be more simple!
Ingredients
-
1L
coconut cream (find a brand that is a high proportion of coconut
- at least 90%)
-
4 tbsp probiotic coconut yoghurt
Tools
Steps
-
Pour the coconut cream into the sterilized jar, and mix in the
coconut yoghurt. Leave in the hot water cupboard or pantry for
24 hours
Tips
-
The longer you leave the yoghurt out of the fridge, the more
tart it will taste.
-
See below for instructions on how to
sterilize jars.
Sauerkraut
Sauerkraut can sell for up to $8, but it's literally just cabbage and
salt! This recipe is from
Radio New Zealand.
Ingredients
-
1 large fresh cabbage*, including
outer leaves
-
1-2 tablespoons non-iodised sea
salt
-
(optional) 1 tablespoon caraway
seeds
Tools
-
1-2 litre capacity sterilised flip-top (Fido) jars or mason jars
Steps
-
Peel off the darker outer leaves of the cabbage and set them
aside for later
-
Using a sharp knife, core the cabbage and shred it into very
thin slices (about as thin as you can cut it easily). If you
have one, you can use a food processor with a shredding
attachment instead.
-
Place shredded cabbage into a large clean bowl. Sprinkle amount
of salt needed to get the 15gms salt/kg of cabbage. Add caraway
seed if using.
-
Toss the salt through the cabbage for a minute or so and then
leave it to sit for 30 minutes.
-
Begin pounding the shredded cabbage with a blunt rolling-pin or
knead/massage it vigorously with your hands. Continue until the
juice comes to the top of the cabbage when pressed (roughly 10
minutes).
-
Place cabbage and juices into cool, clean jars leaving at least
5cm (2 inches) from the top of the jars. This will allow the
cabbage to expand during fermentation without the juice
escaping.
-
Rinse the outer reserved cabbage leaves and curl them up and
place on top of the cabbage and juice and press down gently. Use
as many leaves as you need to keep shredded cabbage below the
juice once the lid is on.
-
Cover tightly and leave at room temperature out of direct
sunlight for 3-14 days. It's done when you like the flavour! You
can start taste testing from day 3. It should taste sour and a
bit salty and sometimes fizzy.
-
Once it tastes ready store it in the fridge. It will keep for at
least 6 months in the fridge.
Tips
-
Cabbage quality is key! A dry cabbage will produce a dry kraut.
The best cabbages are dense, juicy cabbages. Also, if wanting to
use red cabbage, it is best to do a 50/50 mix of green and red
cabbage as the red cabbage tends to produce a soft kraut, while
the green stays nice and crunchy.
-
The ratio of salt is actually quite important and the general
rule of thumb is to use approximately 15gm salt per kg of
cabbage. This keeps the kraut crispy while not being overly
salty. Marlborough sea salt or pink Himalayan sea salt work
really well.
-
Make sure your jar is made from a thick, sturdy glass as a
surprising amount of pressure will build up inside of the jar
during fermentation and we want to avoid an exploding jar!
-
You can flavour with caraway seeds, or experiment with other
flavours
-
See below for instructions on how to
sterilize jars.
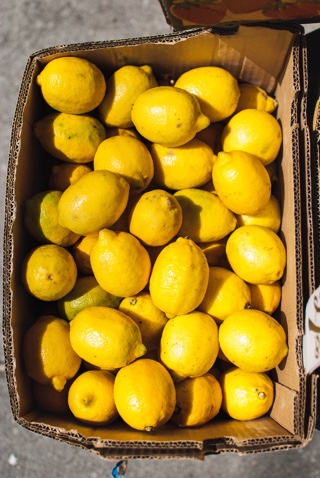
Preserved lemons
If you've never tried preserved lemons, you're in for a treat. The
preserving process mellows out any bitterness, and you can eat the
whole lemon - rind included. Try it in tangines, grain salads or pasta
dishes. This recipe is from
Food in a Minute.
Ingredients
- lemons
- plain coarse salt
- extra lemon juice
- 1 bay leaf
- peppercorns
Tools
Steps
- Place 1 tablespoon coarse salt into a sterilised jar.
-
Wash lemons well and cut a small slice off each end of the
lemon. Without cutting right the way through the lemon cut into
quarters from top to bottom. Rub a generous tablespoon of salt
on all the cut edges of the lemon and squeeze as many lemons as
possible into your jar. Add a few bay leaves and peppercorns.
-
Cover the lemons with extra lemon juice and boiling water. Seal
the jar and place in a cool place turning the jar every few
days. Use after a month.
-
Once opened keep refrigerated. Rinse off extra salt before using
the pulp and rind when cooking Moroccan style dishes or whenever
you want a lovely lemon flavour in savoury dishes.
Tips
-
Tips - While you can eat the whole lemon, it's a good idea to
remove the seeds first.
-
See below for instructions on how to
sterilize jars.
Sterilizing jars
Get rid of those pesky germs.
Tools
- jar(s)
- roasting pan or tray
Steps
-
Pre-heat the oven to 160 celcius fan, or 180 conventional, and
set a pot of water to boil on the stove
-
Separate the jars, lids and any rubber seals. Wash all
thoroughly with hot soapy water
-
Place the jars upside down on the roasting tray, and place in
the oven for 15 minutes
-
Place the lids and seals in the pan of water. Let the seals boil
for 3 minutes, then remove and place on a clean tea towel to air
dry. Let the lids boil for a further 10 minutes and then do the
same
-
Once the time is up, remove the jars from the oven and allow to
cool